Tuesday, January 31, 2012

Conversation Heart Wall/Door Hanging

Hello!

Today I'm showing off a fun project I made for my front door {so it wouldn't be naked anymore}.  I found the idea off of Pinterest and ran with it.


Isn't it cute!


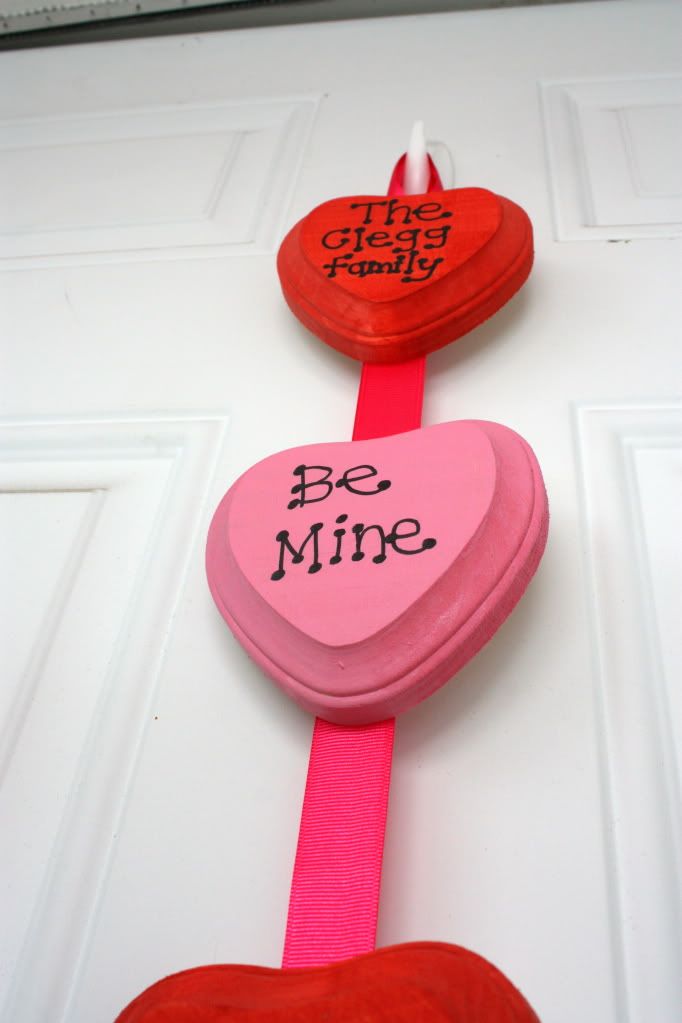
I strayed away from the Pastel colors, and went with Red & Pink instead.


Here's how I made mine:
Materials:
  • 6 Wooden Hearts {I found mine at Hobby Lobby & they were 2-$1, plus an extra 30% off...score}
  • Paint
  • Ribbon {I just picked up a roll 1" ribbon at Hobby Lobby because it was on sale}
  • Permanent Marker
  • Stapler
Directions:
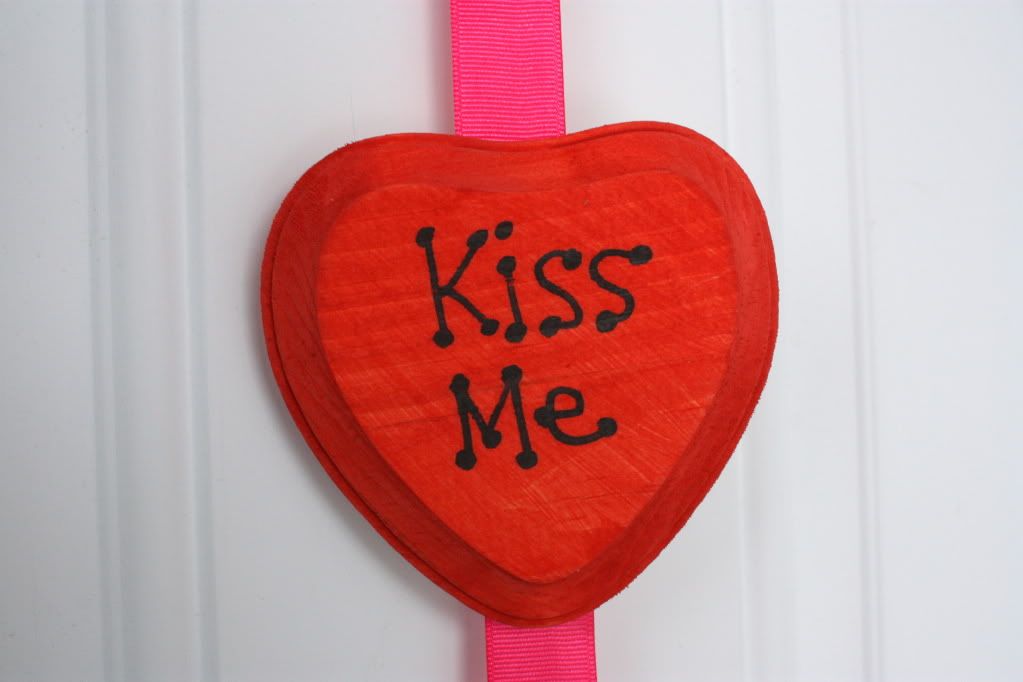
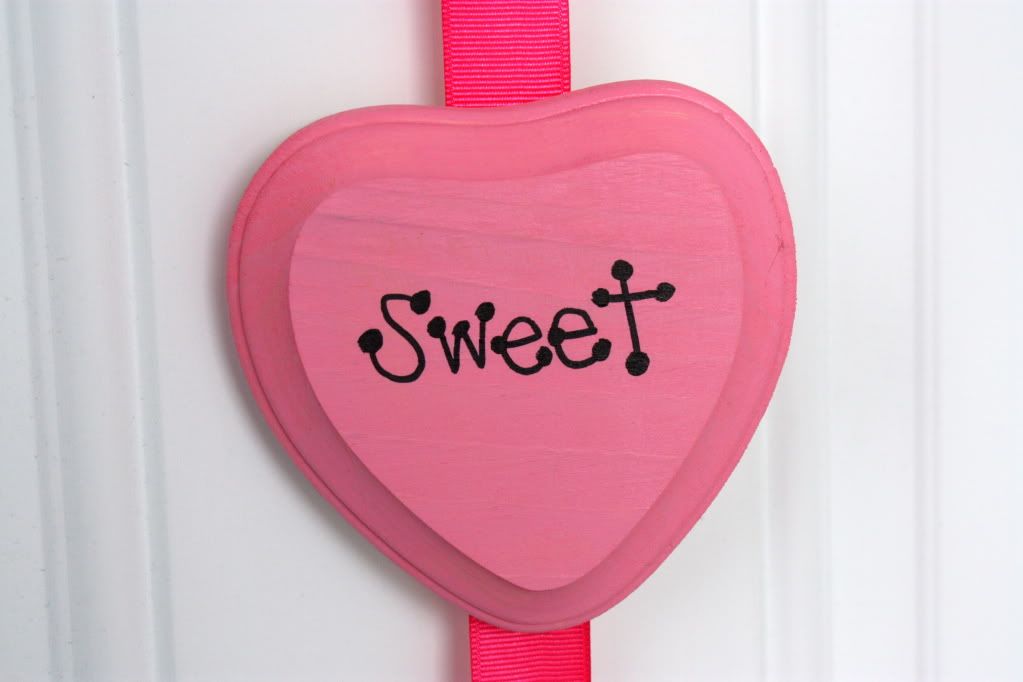
  1. First, I painted my hearts.  The Pink took really well to the wood & only needed one coat.  The Red took two coats.
  2. After the paint dried, I decided to go really easy & just use a permanent marker & write on the hearts.  I had thought about making some stencils, or using my Mom's cricut to cut out vinyl, but I wanted to get this project done.
  3. I layed out my ribbon and just used my regular stapler to stapled the ribbon to the wood.  It's such a soft wood that the stapled went in pretty easy.
And that's that...

Super Easy, and now I have a fun Valentine decoration {my first one!}.


Thanks for stopping by!

Monday, January 30, 2012

I Heart Faces : "Oh So Silly"

Photo Challenge Submission 

It's been awhile since I've entered a photo, but when I saw the theme for this week, I knew I had a picture to show off.


I took some pictures for some friends {who were totally fun to work with}, and between everything, the kids started fooling around...and I went along with it.

The expression on the boys face is hilarious, and according to his Mother, is all him.

Photobucket

Valentine Bingo-w/a Twist

One of the fun things that I get to do this year, is plan parties for my son's first grade class {well..the entire first grade}.  Coming up is the Valentine Party, so I've been perusing the internet to get some fun ideas.  Then I came across this pic on Pinterest, and I decided to run with the idea.

What's the idea???  Valentine Bingo with a Twist.


Can you guess how it works???

Instead of just regular bingo with letters & numbers, I went to my son's planner and looked at all his weekly spelling lists.  The idea is, when I pull out a word, like "Whale", the kids will have to listen to the word & place the marker in the appropriate spot {which would be the WH spot}.  So on the Bingo card, I put down beginning & ending sounds....THese or wELL.
Make sense??  And all the words that I used {and are in the link below}, are words that the kids should know.

So if you're looking for a fun, educational game for kids to play, I hope you try this out!

Thanks for stopping by!

Sunday, January 29, 2012

Weekly Winners : Jan 22-28, 2012

*All Shots taken with my Canon Rebel xsi*

-I know it's a little blurry, but it was so funny watching little girl try & eat this gigantic slice of pizza-


-Peace & Quiet-


-and my Self-Portrait for the week....with me modeling the lovely hospital gown {and ack!  No Make-up}-


Thanks for stopping by!

Photobucket

Friday, January 27, 2012

Carmelized Onion & Sausage Pizza


I don't like raw onions, but I've discovered that I really like carmelized onions.  When I was trying to think of different kinds of pizzas that I wanted to try, this combination came into mind.


And boy....Did I load this pizza up.  It was awesome.


And even though I teared up while cutting up the onions, and then made my house smell like onions, I would do it again to make this pizza again.


Camelized Onion & Sausage Pizza
{Printable Recipe}
Ingredients
·         Pizza Crust {use your own recipe, store bought, or here…use mine!}
·         Your favorite Pizza Sauce
·         Italian 5-Blend Cheese
·         ½ lb of Sausage-cooked {I used Johnsonville Sausage & I loved it!}
·         2 Onions-sliced {slice each onion in half & slice very thinly}
Directions:
1.       Preheat oven to 450
2.       Take your rolled out pizza dough, and spread some of your favorite Pizza Sauce over it.
3.       Start layering: Sausage, Onions, and just a little bit of cheese.
4.       Bake in the oven {I use a pizza stone} for about 12 minutes or until the crust is a nice golden color and the cheese has melted.
5.       Slice & serve!
Thanks for stopping by!

Thursday, January 26, 2012

BBQ Chicken Pizza


How are ya'll liking Pizza Week???  So much more variety than plain ole' pepporoni :)

Today I'm giving you another sweet pizza....BBQ Chicken.


Why sweet??  Because the BBQ sauce carmelizes in the oven while cooking-Yummo!


This is a great pizza to make along side the Thai chicken...they use alot of the same ingredients.


BBQ Chicken Pizza
{Printable Recipe Found Here}
Ingredients
·         Pizza Crust {use your own recipe, store bought, or here…use mine!}
·         Your favorite BBQ Sauce
·         Italian 5-Blend Cheese
·         1 Chicken Breast-cooked & shredded
·         2 Green Onions-sliced {green and white parts}
·         3 Mini-yellow Sweet Bell Peppers or ½ yellow Bell Pepper –chopped
Directions:
1.       Preheat oven to 450
2.       Take your rolled out pizza dough, and spread some of your favorite BBQ Sauce over it.
3.       Start layering: chicken, peppers, onions, and lastly the cheese
4.       Bake in the oven {I use a pizza stone} for about 12 minutes or until the crust is a nice golden color and the cheese has melted.
5.       Slice & serve!
Thanks for stopping by!

Wednesday, January 25, 2012

Sausage, Pepper & Mushroom Pizza


Now....this pizza was made specifically for my Hubby.  Because if you know me, then you would know that I don't care for Mushrooms.  But I ate this pizza & thoroughly enjoyed it, which makes me wonder how in the world did I get mushrooms to be acceptable.


The slight crunch in the bell pepper was enjoyable with the great sausage/mushroom combination.

And of course, I had to load up this pizza as well {but my dough can handle it}.


Sausage, Pepper & Mushroom Pizza
Ingredients
·         Pizza Crust {use your own recipe, store bought, or here…use mine!}
·         Your favorite Pizza Sauce
·         Italian 5-Blend Cheese
·         ½ lb of Sausage-cooked {I used Johnsonville Sausage & I loved it!}
·         1 Green Bell Pepper-Sliced
·         10 Mushrooms-cleaned & sliced
Directions:
1.       Preheat oven to 450
2.       Take your rolled out pizza dough, and spread some of your favorite Pizza Sauce over it.
3.       Start layering: Sausage, Mushrooms, Peppers and Cheese
4.       Bake in the oven {I use a pizza stone} for about 12 minutes or until the crust is a nice golden color and the cheese has melted.
5.       Slice & serve!
Thanks for stopping by!
Photobucket
I’m Linking up to these Awesome Blogs!

Tuesday, January 24, 2012

Artichoke-Spinach Chicken Pizza


So.  This pizza ventured out of our families normal comfort zone.  We are not known for eating either Artichokes or Spinach, but after having a fantastic pasta dish in Logan, I'm hooked on the flavor combination.


This pizza's got:
Chicken
Artichokes
Spinach
Green Onions
Italian Cheese

My husband thought that it could use a little salt, like green olives {so he broke out the pepporachini jar and drizzled some juice over his slice since we didn't have any olives}.


It was a great pizza, and again, I didn't feel guilty about eating it!

Artichoke-Spinach Chicken Pizza
{Printable Recipe}
Ingredients
·         Pizza Crust {use your own recipe, store bought, or here…use mine!}
·         Your favorite Pizza Sauce
·         Italian 5-Blend Cheese
·         1 Chicken Breast-Cooked & Shredded
·         1 Can of Artichoke Hearts {although I only chopped up 5 of them to make one pizza}
·         1 box of Frozen Spinach-thawed
·         2 Green Onions –Chopped
Directions:
1.       Preheat oven to 450
2.       Take your rolled out pizza dough, and spread some of your favorite Pizza Sauce over it.
3.       Start layering: Chicken, Artichokes, Spinach, Green Onions & Cheese
4.       Bake in the oven {I use a pizza stone} for about 12 minutes or until the crust is a nice golden color and the cheese has melted.
5.       Slice & serve!

Monday, January 23, 2012

Thai Chicken Pizza


To kick start my Pizza week, I'm giving you one of my Husband & I's new favorite flavor.....Thai Chicken Pizza!


I made this for a family get-together a couple of weeks ago, and it was the sleeper hit.  I personally think it's the sweet peanut sauce that's used for the base.

This pizza has great ingredients....I feel like it's a "healthy' pizza.


The first time I made this pizza, I totally forgot the cilantro....so I made sure that the second time I made this, I would add the cilantro.  Lesson learned though, I should have added it at the very end, it wilted in the oven.


You need a good thick dough for this one...no thin/crispy crust for these ingredients.


I loved everything about it!  In fact, right now, thinking about this pizza is making me remember all the tastes.


Thai Chicken Pizza
{Printable Recipe Here}
Ingredients
·         Pizza Crust {use your own recipe, store bought, or here…use mine!}
·         1 Chicken Breast-cooked & shredded
·         2 Green Onions-sliced {green and white parts}
·         ¼ Cup Shredded Carrot
·         3 Mini-yellow Sweet Bell Peppers or ½ yellow Bell Pepper –chopped
·         ¼ cup Peanuts-chopped
·         A handful of Cilantro-chopped
Peanut Sauce:
·         ¼ Cup Smooth Peanut Butter
·         2 Tbl Water
·         4 Tbl Sugar
·         1 tsp Lime Juice
·         1 Tbl Soy Sauce
·         1 tsp Rice Wine Vinegar
Directions:
1.       Preheat oven to 450
2.       To make the peanut sauce, add all the ingredients into a shaker & shake to combine.
3.       Take your rolled out pizza dough, and spread some of your peanut sauce over it.
4.       Start layering: chicken, peppers, onions, peanuts, carrots & cilantro
5.       Bake in the oven {I use a pizza stone} for about 12 minutes or until the crust is a nice golden color.
6.       Slice & serve

Sunday, January 22, 2012

Weekly Winners : Jan 15-21, 2012


*All shots taken with my Canon Rebel xsi*

-hmmm....Apples!-


-The mixer was telling me to make cookies....and I did.-


-Sitting down to play a little-


-Artsy shot of my Piano-


-Self Portrait for the week-


Thanks for stopping by!

Photobucket

Wednesday, January 18, 2012